

 How To Add Responsive Page Number Navigation. Today I want to share about
tutorial How To Add Cool Page Number Navigation For Blogger. Page number
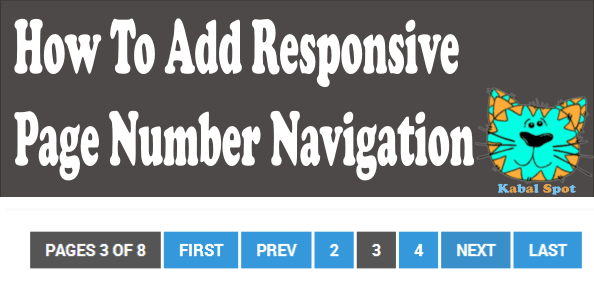
navigation will show your newest and oldest article in your blog's
homepage. By adding this one, the visitors can move to the other post
pages easily. Many blogger neglected design of Number Navigation itself.
They just satisfy about simple Number Navigation in their blog. In my
opinion, if we can make it awesome why we stay at simple design. We are
blogger and we need visitors to read our articles. If your design
simple, they will not attractive to visit your blog again. Let's we make
our design more awesome than others, make your visitors feel
comfortable when they looking for an article at your blog. This tutorial
is very simple, I'm sure you can apply it. The main point, this script
supported by responsive design. Do not be afraid if it won't work on
mobile view. I will try to make it clearly, please follow the steps
below.
How To Add Responsive Page Number Navigation. Today I want to share about
tutorial How To Add Cool Page Number Navigation For Blogger. Page number
navigation will show your newest and oldest article in your blog's
homepage. By adding this one, the visitors can move to the other post
pages easily. Many blogger neglected design of Number Navigation itself.
They just satisfy about simple Number Navigation in their blog. In my
opinion, if we can make it awesome why we stay at simple design. We are
blogger and we need visitors to read our articles. If your design
simple, they will not attractive to visit your blog again. Let's we make
our design more awesome than others, make your visitors feel
comfortable when they looking for an article at your blog. This tutorial
is very simple, I'm sure you can apply it. The main point, this script
supported by responsive design. Do not be afraid if it won't work on
mobile view. I will try to make it clearly, please follow the steps
below.How to install Page Number Navigation
The first step by adding CSSGo to Blogger Dashboard> Template> Click on the Edit HTML Button. Click inside the html code area and press Ctrl+F for open the HTML search box.
Now, find this code ]]></b:skin> or </style> by using your search box. When you get it then copy below code and paste the code just above ]]></b:skin>.
.pagenavi{clear:both;margin:20px 0 10px;text-align:center;font-weight:bold;color:#fff !important;text-transform:uppercase}
.pagenavi span,.pagenavi a{padding:5px 15px;margin-right:3px;display:inline-block;color:#fff !important;background-color:#3498db;}
.pagenavi .current{color:#fff !important;background-color:#555;}
.pagenavi .current,.pagenavi .pages,.pagenavi a:hover{color:#fff !important;background-color:#555;}
.pagenavi .pages {margin:0 -1px 0 0}
For the next step, find the code like this
<b:widget id='Blog1' locked='true' title='Posts Blog' type='Blog'>After you find the code, then copy the code below and save just below the above code.
<b:includable id='page-navi'>
<div class='pagenavi'>
<script type='text/javascript'>
var pageNaviConf = {
perPage: 5,
numPages: 5,
firstText: "First",
lastText: "Last",
nextText: "Next",
prevText: "Prev"
}
</script>
<script type='text/javascript'>
//<![CDATA[
function pageNavi(o){var m=location.href,l=m.indexOf("/search/label/")!=-1,a=l?m.substr(m.indexOf("/search/label/")+14,m.length):"";a=a.indexOf("?")!=-1?a.substr(0,a.indexOf("?")):a;var g=l?"/search/label/"+a+"?updated-max=":"/search?updated-max=",k=o.feed.entry.length,e=Math.ceil(k/pageNaviConf.perPage);if(e<=1){return}var n=1,h=[""];l?h.push("/search/label/"+a+"?max-results="+pageNaviConf.perPage):h.push("/?max-results="+pageNaviConf.perPage);for(var d=2;d<=e;d++){var c=(d-1)*pageNaviConf.perPage-1,b=o.feed.entry[c].published.$t,f=b.substring(0,19)+b.substring(23,29);f=encodeURIComponent(f);if(m.indexOf(f)!=-1){n=d}h.push(g+f+"&max-results="+pageNaviConf.perPage)}pageNavi.show(h,n,e)}pageNavi.show=function(f,e,a){var d=Math.floor((pageNaviConf.numPages-1)/2),g=pageNaviConf.numPages-1-d,c=e-d;if(c<=0){c=1}endPage=e+g;if((endPage-c)<pageNaviConf.numPages){endPage=c+pageNaviConf.numPages-1}if(endPage>a){endPage=a;c=a-pageNaviConf.numPages+1}if(c<=0){c=1}var b='<span class="pages">Pages '+e+' of '+a+"</span> ";if(c>1){b+='<a href="'+f[1]+'">'+pageNaviConf.firstText+"</a>"}if(e>1){b+='<a href="'+f[e-1]+'">'+pageNaviConf.prevText+"</a>"}for(i=c;i<=endPage;++i){if(i==e){b+='<span class="current">'+i+"</span>"}else{b+='<a href="'+f[i]+'">'+i+"</a>"}}if(e<a){b+='<a href="'+f[e+1]+'">'+pageNaviConf.nextText+"</a>"}if(endPage<a){b+='<a href="'+f[a]+'">'+pageNaviConf.lastText+"</a>"}document.write(b)};(function(){var b=location.href;if(b.indexOf("?q=")!=-1||b.indexOf(".html")!=-1){return}var d=b.indexOf("/search/label/")+14;if(d!=13){var c=b.indexOf("?"),a=(c==-1)?b.substring(d):b.substring(d,c);document.write('<script type="text/javascript" src="/feeds/posts/summary/-/'+a+'?alt=json-in-script&callback=pageNavi&max-results=99999"><\/script>')}else{document.write('<script type="text/javascript" src="/feeds/posts/summary?alt=json-in-script&callback=pageNavi&max-results=99999"><\/script>')}})();
//]]>
</script>
</div>
</b:includable> For the last steps by looking for this code
<b:include name='nextprev'/>Replace the code above with this one
<b:if cond='data:blog.pageType == "index"'>Don't forget to click save, to make customize the design you can read the explanation. For detail setting, you can see below.
<b:include name='page-navi' />
<b:else/>
<b:if cond='data:blog.pageType == "archive"'>
<b:include name='page-navi' />
</b:if>
</b:if>
perPage : The amount you want to appear on a single page
numPages : Number of pages to display
firstText : The first text page
lastText : The last text page
nextText : Text for next page
prevText : Text for before page
What do you think about this tutorial? It is easy to apply, isn't it. Thanks for reading the article about How To Add Responsive Page Number Navigation. I hope you like this post by adding the comment below. I really need your suggestion for fixing my contents.
Advertisement


2 komentar
its not going more than 150 post
You can apply this one "How To Make Unlimited Page Navigation For Blogger" You can find it in my blog.
EmoticonEmoticon